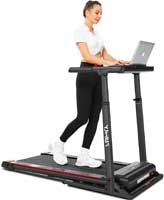
Several treadmill desks + under-desk treadmills can cost over $1500 combined. I admit, that’s a lot of money, and I wanted to find a cheaper solution. That’s when I found the Exerpeutic Treadmill.
Although it can be a worthwhile investment for people with lower back pain or those wanting to lose weight, I thought I’d see if I could turn a regular treadmill into one that could fit under a standing desk (and cut the cost way down).
In short: my DIY Treadmill Desk Project worked. Here’s how I did it.
Step 1: Get an Inexpensive but Well-Made Treadmill
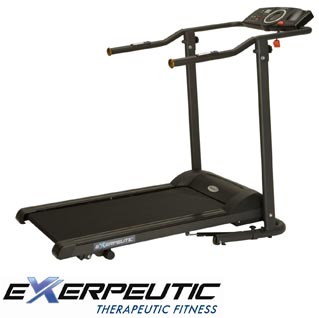
After reading several reviews and testing several machines myself, I chose the Exerpeutic TF1000 Walk to Fitness Electric Treadmill. It included the basic features I needed, it’s pretty quiet, it’s electric so I don’t always have to walk at an incline and from what I had read, the arms could easily be removed for positioning under a desk. (This is correct, by the way.)
One of my main concerns (and one that other people had, seeing from common questions) was the shorter walking belt. I liked the fact that it was shorter, since I planned to use it in a small room but I didn’t want to fall off the end of the treadmill while I walking and working.
Turns out that is not a problem. There is plenty of space. I am 5’8″ tall, and I have also heard from other people who are over 6 feet tall that the length is plenty long enough.
I think the reason that this is not a problem is that when you are typing on a computer or doing other desk work, you actually take smaller steps unconsciously.
This keeps your body from moving as much – which coincidentally makes it easier to work. I don’t think shorter steps are any harder, it’s just different.
Step 2: Take the Treadmill Out of the Box and Put it Together
Once I received the treadmill, I moved it to the location where I planned to use it and unpacked in from the box. I assembled it as a regular treadmill first, so that I could make sure that the machine worked. I am assuming that once I took it apart for my treadmill desk the warranty would be void.
It ran fine with very little noise and I liked it. Next, I unplugged the machine and went to work disassembling it.
Step 3: Remove the Treadmill Arms
Honestly, this was the easiest part of the assembly project. I was pleasantly surprised.
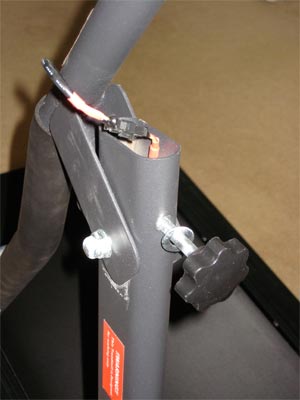
The picture on the right is the arm hinge. The electrical wires run from the base of the machine up the center of the right vertical support post and then through the arm and ends at the front digital display and one arm that also has controls on it.
What makes this project so easy is that the wire that runs up the vertical post and the wires in the arms and front display panel are all attached with small plastic clips. You can unclip them and clip them back together, so no electrical skills are necessary. You can see the clip in the photo.
Anyway, since I was not going to be using the arms, I could disconnect those wires and remove the arms completely (after I removed the bolts holing the arms in place, of course). Then, I simply reconnected the wire that originally connected to the front display panel.
After I connected the front panel, I plugged the treadmill back in to test it. Everything turned on and worked fine. I noticed that there was about 3 feet of wire from the connection at the top of the vertical post to the digital display, so I would have lots of flexibility as far was where I positioned the display. My plan was to have it on my desk within easy reach, but “where” was still to be decided.
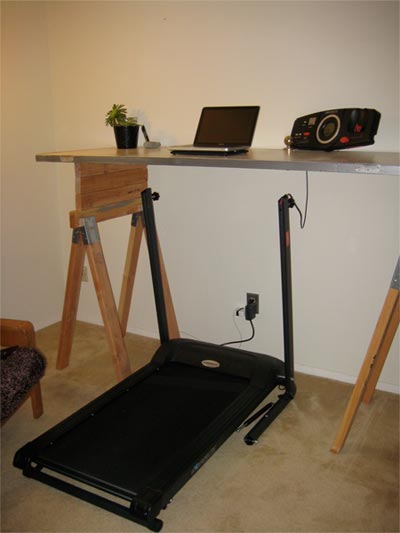
Step 4: Build the Exerpeutic Treadmill Desk
I already had a standing desk made out of an old hollow door and a couple of sawhorses. I really like this set up because it provides a spacious flat surface on which to work, the legs are strong and stable and the set-up is cheap compared to buying a high-tech standing desk. The only downside (in my opinion) is that although it’s adjustable in height, it’s not so easy.
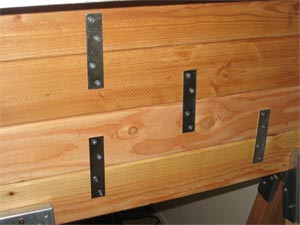
So, since I already had the desk I planned to use, my project really just involved raising the height. I did this by stacking 3 additional 2×4’s and securing them with metal brackets that I got at Walmart. Very basic, but it does the job.
Of course, before I did this, I needed to figure out the right height. This will be different for everyone. I started at my kitchen counter where I placed my laptop computer on top of boxes stacked on the counter at varying heights.
Once I found the height that was most comfortable for me to work at, I measured it and then raised my treadmill desk to that height. Make sure that you incorporate the height of the treadmill belt and the shoes you would typically wear into your measurements.
Do you want to use this same “door table” idea using saw horses? You can find all of the materials you need at your local building supply store. Buy some sawhorse brackets and some 2×4’s and cut them to the size you want (my table legs are 3′ long”). Ikea usually has some more stylish sawhorses as well.
Step 5: You’re Done
Once you’ve built your desk, the only thing you really need to do is place the digital display unit on your desk (or wherever you decide to put it). You’re done, and now you can start walking off those calories, moving your body to relieve stress and stiffness – and simply become one of the cool people with a treadmill desk and money still in your pocket. 😉
See also: